6 Reasons When To Replace Macbook Battery?
Common Symptoms Your Macbook Need Battery Replacement
1. Your Macbook Experience Performance Drops
You heard me right! A faulty MacBook battery does cause a significant macbook performance drop! But not all laptop performance issues are caused by battery life! Why is it so is because the Macbook is highly dependent on the battery. If the macbook battery is saying “Service Recommended” or “Replace soon”, this indicates that the macbook battery health is not in good condition.
I have an early 2011 – 13 inch macbook pro. It is around 16 months old and already has a battery status of “replace now”. The battery is completely dead. Before I had a battery status of “Service Battery” and not it is “Replace”. After I got this battery status, my macbook pro has become really very slow. The cursor moves really slow and I can’t even play any hd movies. I have also tried reinstalling the operating system and setting my macbookpro to factory default. But still no improvements.
The only good thing is that I works fast in the beginning and after a few mins., back to super slow speed.
According to a response from Apple Support Community, Hence, the processor speed will automatically be tuned down to adapt to the not performing battery. This situation is similar to not having a battery installed in the Macbook.
2. Low Battery Run-Time
Remember those days when you first bought your Macbook and the battery life lasts for hours, leaving a lot of juice for you to do your work. But as time past, as you use daily, wear and tear occurs, your battery do not last as long as it could. For those who wants a milder experience, the rule of thumb is always to replace the battery.
3. Macbook Overheating
Any hardware or software issues can cause your MacBook to overheat. However, if your MacBook overheats quickly while performing your daily routine tasks (and especially if it also experiences any of the above symptoms), the culprit may be a faulty battery.
4. Macbook Battery Showing “Service Warning”, Meaning You need to replace macbook battery
The simplest sign that your Macbook Battery Needs replacement is, If it says “Replace Soon,” “Replace Now,” or “Service Battery,” it’s time to look into a replacement.
5. Macbook Shuts Down Unexpectedly
The cause of an unexpected shutdown could range from hardware to software difficulties. It can be due to your macbook battery needing replacement, shortage of memory, to even more sophisticated component which is the logicboard. Regardless of the cause, these occurrences are logged in the log (Utilities > Console).
All battery-powered devices can unexpectedly shut off when the battery lives past its expected shelf life. If your MacBook turns off when you don’t want it to, it could be because the battery is out of juice. If this happens often—and shortly after you charge it—that’s a clear sign that it’s time to replace the battery.
6. Macbok Battery Having High Cycle Count
MacOS has the functionality to show Macbook users how many rounds their battery has been charged! Follow the steps here to learn how to check your cycle count. Each complete charge will increase 1 cycle as per Apple’s description. Hence, the higher the cycle count your Macbook has, the closer you are to replace your battery.
I want to Replace Macbook battery
Book An Appointment if you want to get your macbook battery replaced within 30 minutes! No one has ever done it this fast.
Want to get a quote on the macbook repairs that we do,
How To Show Battery Percentage On MacBook
Getting into the Settings on How To Show Battery Percentage On Macbook
- Launch System Preferences, from the Applications folder, or from the Apple menu bar ( -> System Preferences…).
2. On the left side bar, look for “Other Modules” section.
3. Under “Other Modules” section, pick “Battery“.
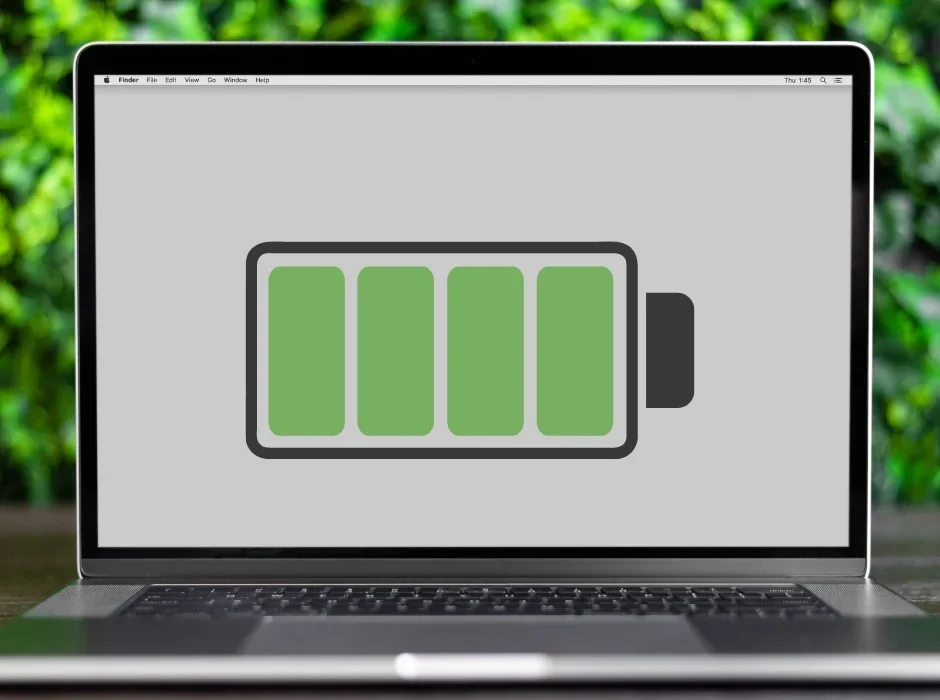
Now that the settings are well configured, you will see the percentage next to the battery icon in the menu bar, giving you a better idea of how much juice your Macbook has left before you have to plug it in to charge again.
Macbook Won’t show Battery Status In Menu Bar?
If your Macbook Air or Macbook Pro does not have a battery icon displayed in your menu bar, there may be possibilities that your Macbook is unable to detect the battery installed. There are 2 ways to go about figuring out Why is the battery status not showing up in the menu bar on your mac:-
1. Perform SMC Reset.
What is SMC (System Management Controller)?
SMC in short refers to System Management Controller which regulates the power related activities on your Mac. One of the roles it manage is battery management of your Macbook. Performing a SMC reset may let the Macbook re-recognize your installed battery, hence showing the battery status in the menu bar of your macbook.
You may refer to this guide on How To Perform SMC reset on your Macbook.
2. Re-attach your Macbook Battery
NOTE : This applies to people with technical know-how only.
If you have the expertise to open up your Macbook back cover, you can give that a try. Reattached the Macbook battery to your logicboard and try switching your Macbook on to see if the battery icon appears. If it does, then most probably the battery icon varnish due to battery plug being loose.
If the battery icon still does not appear after reattaching the macbook battery to your logicboard, then most probably you have run into a Macbook Battery Failure as the macbook’s health condition has deteriorated to the extent that the macOS is unable to detect the existence of the battery installed.
3. Send It To A Mac Expert
Sending your Macbook to a trusted Macbook Repair Service provider will ease you a lot of hassle of doing the 2 steps mentioned above. Macbook Repair service providers like us will ensure the Macbook is diagnosed thoroughly on why the show battery status in menu bar not working on mac.
If you are having problem with your iPhone Battery or Macbook battery needs replacement, feel free to book an appointment and let us help you!
Improve Usage With Accessibility Features On Mac
How To Use Accessibility Features On Mac
Reduce Motion On Mac
Reduce motion reduces the animation throughout macOS (although it does not remove it all). To activate the feature, click Display in the sidebar of the Accessibility panel. Tick the Reduce motion.
When utilising apps in full-screen mode, the modifications are most visible. When an application enters full-screen mode, the desktop disappears and the app window expands to fill the screen. When switching between full-screen applications, a full-screen slide transition is presented.
Crossfades replace these transitions when decrease motion is enabled. This reduces the likelihood of becoming dizzy when fatigued; yet, others believe the simpler effect looks better and feels quicker (even if the latter is a placebo).
Adjust contrast and transparency in macOS
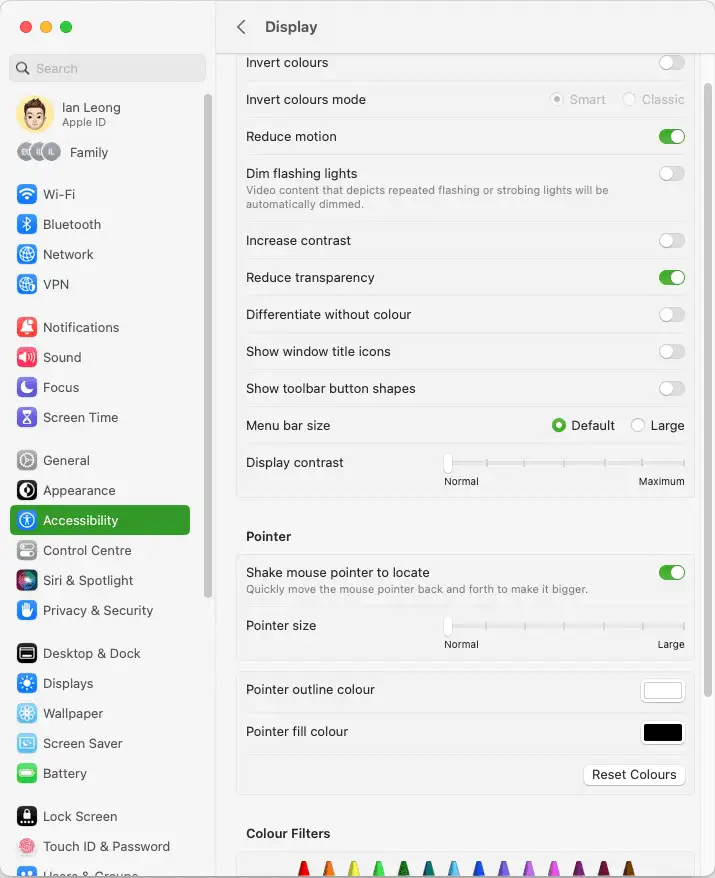
Some programmes on macOS feature semi-transparent panels and toolbars. If something colourful is placed beneath these surfaces, a hazy approximation of those hues will appear. However, if the content beneath is animated, these areas can quickly become distracting.
In the Display section of Accessibility, enable Reduce transparency. Translucent panels and toolbars will turn opaque (as will the macOS menu bar and its menus, which are otherwise also semi-transparent). On older hardware, this accessibility features on mac may modestly increase performance.
You can further improve readability by activating Increase contrast, which darkens the borders of panes and buttons. However, this impact may be too obvious for certain users, not least since selection colours also become significantly darker.
RELATED : How to Use Accessibility Features On iOS
Enlarge your Mac’s cursor
When the mouse was shaken,’ its pointer temporarily grew in size. This setting is located in the Display area of Accessibility and is enabled by default.
Adjust the Cursor size setting if you frequently lose track of the pointer, which is simple on a larger screen. Normal is the default size, whereas Large is enormous. There may be something in between suits.
Let your Mac speak to you
Macs have been able to communicate for a long time and now have a variety of voices. In the Spoken Content section of Accessibility, you can select a voice from System Voice and download new voices, genders, and accents from the voice selection page accessible via the Customize button. Using the Speaking Rate slider, it is possible to modify the playback speed.
The pane provides two main methods for your Mac to communicate. Enable Speak announcements to have your Mac alert you when it needs your attention. And by using Speak selection when the key is pushed, a custom keyboard shortcut will cause your Mac to read the selected text aloud.
This second option may seem peculiar, yet it is quite beneficial when proofreading content. When words are read aloud, you frequently notice errors that you would have missed if you had read them silently.
Make your Mac work in silent spaces
You can mute your Mac using its mute key, but Accessibility Features on mac includes a handful of helpful settings for retaining critical interactions in environments when silence is required. Enable Flash the screen when an alert sound happens under Audio. When an alarm occurs, your screen will flash briefly to attract your attention.
Turn on Enable Type to Siri in Siri. This allows you to text inquiries to Siri instead of speaking them. Note, however, that this disables the standard functionality. Therefore, if you prefer speaking to Siri, deactivate this setting when you return to a setting where speaking is not frowned upon.
I am currently using MacOS Monterey, if you want to check out other accessibility features on mac, what are the other accessibility features that you can enable or disable on your mac, you may refer to here.
How To Reset PRAM On Your Mac Easily
Credit : Unsplash / TheRegistri
What is PRAM?
You may be familiar with Random Access Memory (RAM), sometimes known as RAM. Memory should not be mistaken with your computer’s storage (space on the hard drive), as RAM comprises of computer chips that hold active apps and processes. When you open an application, you instruct the computer to load it from the hard drive into the RAM. Once the application is closed, it exits RAM and makes space for other applications.
RAM can also be utilised to store system configurations. How does your computer remember the current time, display brightness, and system volume? This is the PRAM, which stores system information even when the computer is shut down. PRAM is the abbreviation for Parameter Random Access Memory, and it stores information on your startup disc, display resolution, and speaker level, among other things. PRAM, unlike other forms of RAM, is not reset when the machine is powered off. This is due to the fact that a small battery is placed, which retains the data when the computer is off.
What is NVRAM?
NVRAM is the updated word for PRAM on Macs and is an abbreviation for Non-Volatile RAM. Since NVRAM is non-volatile, the settings do not alter when the computer is turned off or the power is disconnected. In terms of troubleshooting, resetting NVRAM or PRAM on a Mac accomplishes the same thing.
Hence, we can say Resetting PRAM = NVRAM Reset on a mac.
When Do You Need To Reset PRAM?
By resetting the PRAM/NVRAM, information regarding startup discs and device connections, such as MIDI devices and audio interfaces, will be deleted. What are the actual situations that you need to do PRAM Reset on Your Mac?
- Your mac does not boot Up correctly
- Devices are not showing up on your mac
- Monitors connected are not displaying correctly on your mac
- Internal and external hard drives are not connecting to your mac properly (Afraid Of losing your data on your mac, we have an article that covers 4 Best ways to backup your data on your mac)
- Something wrong with your bluetooth connection to your mac
- Date and time has gone haywire
How to Reset PRAM or NVRAM?
There are multiple ways to reset the NVRAM if you determine that doing so could fix your problem. The most frequent way involves pressing and holding a few keys while turning on a Mac.
Method 1 : Startup Command
- Shut down your Mac.
- Press the power button on your Mac once and simultaneously press and hold ⌘ + option + P + R.
- Hold the keys until your Mac restarts for a second time. When older Macs resume, the chime will play. On more recent Macs, the Apple logo will briefly appear before disappearing.
Method 2 : Reset PRAM via Terminal
Follow the procedures below if you do not have a wired keyboard, or connect one and utilise Method 1. Or if you like to do things differently, you may follow method 2.
- Close all applications and launch Terminal (Finder > Applications > Terminal).
- Enter sudo nvram -c followed by the Enter key. Enter the Administrator password, then press the Enter key.
- Enter sudo shutdown -r now and press the Enter key. The computer will now restart, and that’s all there is to it!
MacBook Service Battery Warning – How Long Can It Last?

Image By Mia Baker @ Unsplash
When surfing the Internet and performing common computing chores such as word processing or listening to music, a regular MacBook, MacBook Air or MacBook Pro may last for roughly 3-8 hours. If you are doing extensive tasks, such as video or audio editing, the battery life will be reduced.
How long do you think your battery will last at that level of performance?
According to Apple, the new batteries are meant to withstand 1,000 full charge-discharge cycles, after which the battery should retain 80% or more of its original capacity.
Your battery will still work after this extended life cycle (a complete drain and recharge every day for three years), but it won’t have the same ability to keep a charge as it had when it was new. It is going to happen. It will steadily degrade over time and eventually stop working completely, but this can take years.
MacOS is quite clever when it comes to calculating cycles. Partially charged batteries do not count as full cycles; if you discharge your battery and then charge it again, it will only count as a fraction of a cycle for internal monitoring.
What Does Macbook Service Battery Warning Means?
The health of your MacBook’s battery is monitored. A popup will appear when you hover your mouse over the battery indicator in the status bar at the top of your screen, displaying the battery status, remaining power, and a list of programs that are using a lot of power.
There are four battery status messages:
- Normal : Your battery is operating within normal parameters. (This simply means your Macbook Battery is Healthy!)
- Service Battery : The battery is holding less of a charge than it did when it was new. (Symptoms Of A Failing Battery Starts to Portray)
- Replace Soon : The battery still works but has degraded significantly. It’s time to start looking for a new battery.
- Replace Now : There is something wrong with your battery and it needs to be replaced as soon as possible. (Goodbye Battery)
When you receive a ‘Service Battery’ message, the first thing you should do is examine the ‘System Report.’ This will show you the number of cycles your MacBook battery has completed as well as its general condition.
iPhone Battery Health: You Need to Know
How to Extend Battery Health & When to Replace
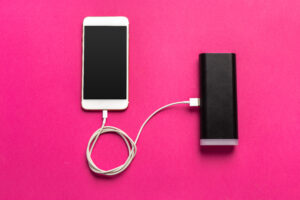
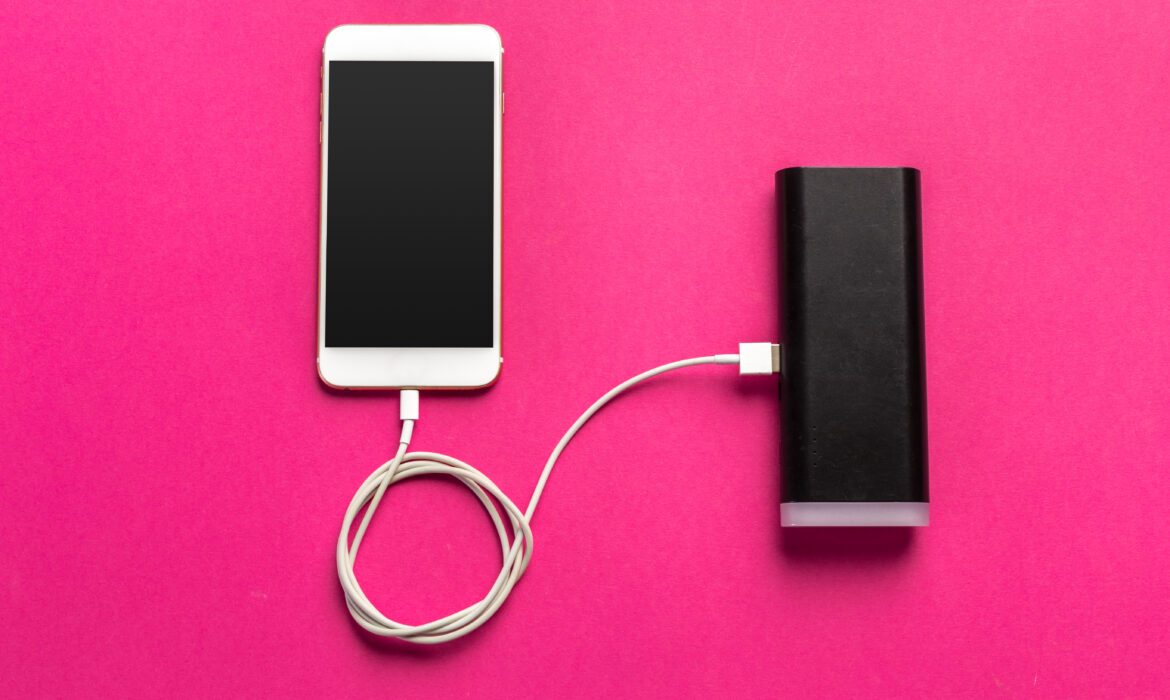
phone mobile connect to battery power bank
If you’re wondering how to extend battery life, the key is to make sure you’re taking proper care of your battery and minimizing the use of apps and features that tend to drain it. Some suggestions include:
- Use wifi to download data; it uses less power than a cellular network.
- Turn off your wifi when you’re not using it. Searching for wifi connections tends to eat battery.
- Keep your brightness level down by turning on auto-brightness. Go to Settings, then General, then Accessibility, then Display Accommodations and turn auto-brightness on.
- Turn on low power mode. When your phone gets down to 20%, it’ll tell you and give you the option to turn on low power mode. In low power mode certain functions (like Mail) won’t automatically download content, but you can still use your phone for texting, phone calls, etc. Once you charge your phone low power mode will turn off automatically.
- Keep an eye on your battery functionality under Settings, then Battery. It’ll show you battery level, activity, and battery level by app so you can see what’s draining your juice.
- Leave apps open when you’re not using them. Close them out when you’re finished to save battery life.
- Leave your phone in the hot sun or other areas that have high temps.
- Overuse certain apps and features that tend to drain the battery including flashlight mode. Check which apps are using the most battery and minimize their use time.
- Use the dynamic backgrounds feature, which shows moving backgrounds on your phone home screen. While it looks great, it tends to drain the battery.
- If You want some more tips, we have a dedicated article on how to extend your battery life.
As far as when to replace your battery, look for signs like having to recharge your battery more frequently, your phone dying when the battery is still at 10% or more, your phone only working when it’s plugged in, or your Battery Health settings indicating a problem.
iOS Expects 25% User Growth from Android?
According to statistics from Statista, Android’s global market share has decreased over the past few years, falling from 77.32% in 2018 to 69.74% in 2019, according to StockApps (via Wccftech). Even though iOS still has a significant lead over Android, it seems like it is making progress. In the same amount of time (five years), iOS’s market share of smartphones increased from 19.4% to 25.49% as of January 2022. With the new iPhone 14 launching on Sept 4, 2022, we may expect to see a bigger jump in terms of iOS market share.
Having said that, why are so many Android users predicted to switch platforms in 2022? As you might expect, there isn’t a simple answer because Apple has been producing dependable and attractive phones for a very long time. If some Android users had decided to convert at any point, they could have done so years ago.
Let’s examine what would persuade Android users to move to the iPhone and iOS before addressing the more crucial query of whether Android users should actually consider an iPhone in light of iOS 16 and the iPhone 14 or hold off until the iPhone 15 series, which is (spoiler) what I intend to do.
Source: yahoo.com
Does iPhone slows down over time
This is one of the common questions and one of the most speculated questions around iPhone doubters, does iPhone slows down over time. The simple answer is no, the phone itself isn’t tuned to slow down after years of usage but there are reasons for iPhone owners to feel this way.
First and foremost, new software update tends to bring additional features and is more demanding of hardware, putting a strain on the processing power of older phones which as a result sacrificing the speed and battery life for better security and features.
Not only that, another reasons that people felt their iPhone slows down is because Apple and developers optimizes iOS and their apps to work on newer hardware in order to give new customers the best possible experience. As a result, you may notice minor slowing down but in actuality, it runs at the same speed as before; it just takes longer to complete particular tasks due to the optimization.
In a nutshell, iPhone slows down not because of Apple intentionally made so but it’s the constant update of software and application in order to made used to the new and improved iOS that Apple produced.
Should I have my repair iPhone in the center or the Apple Store?
Phone repair has always been a thing, especially for iPhone repair as you can’t just swap out the battery and so on. Although the repair industry is quite established, especially in Singapore, it has a bad rap among the public as people tend to associate third-party repairers with not using original parts. Although some third-party repairs might do that, it has affected the industry. So, it is important to find a reliable third-party repairer. There are a few opinion on this matters, Fix my Gadget showcase the pros and cons of both.
As a third-party shop repairer, there are certain situations where we would recommend for you to go to the Apple Store while there are situations where a third-party shop works wonder.
So, in what situation do you go to the Apple store?
If you are facing some issues after purchasing your iPhone not too long ago, you should take it back to the Apple Store that you bought it from as they will most likely exchange it for you. Not only that, if you face any software issues, sometimes the third-party repairer would not be able to do anything in regard to it.
Where is it fine to repair it in a repair shop?
There are a few situations where we will highly recommend bringing it to a trusted repair shop like us. Firstly, it will be the iPhone service or any kind of mobile servicing. This is because the process of servicing does not require any other component from the Apple Store.
Other than that, we would also recommend changing small components of the phone like iPhone screen repair, iPhone screen replace, or iPhone battery replacement would also be better to fix on the reliable third-party store as it is more likely to be cheaper.
Check out The Fix Bot for affordable yet reliable options of iPhone reparation.

