Should I have my repair iPhone in the center or the Apple Store?
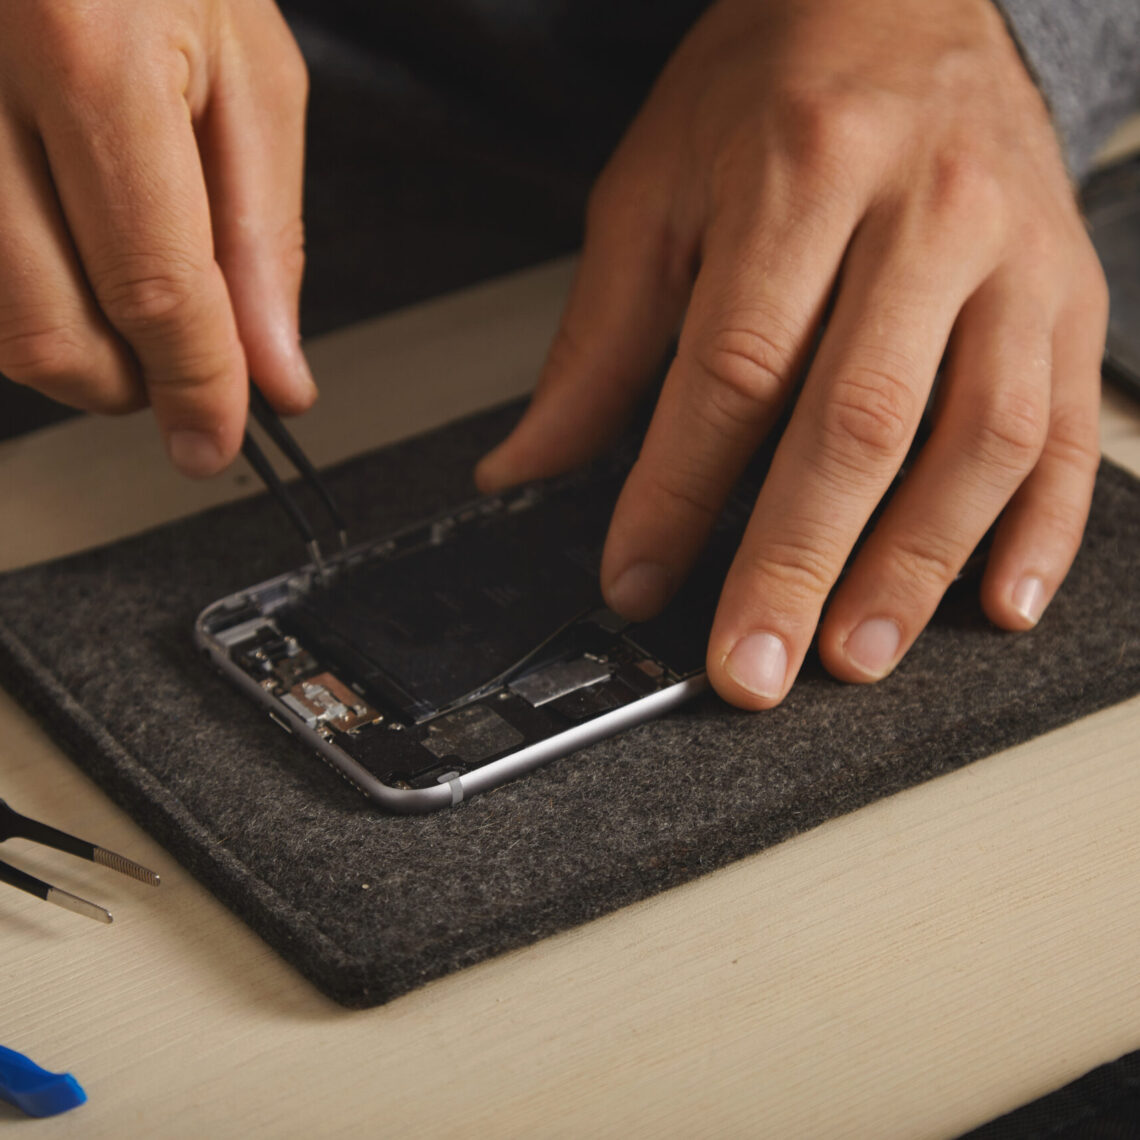
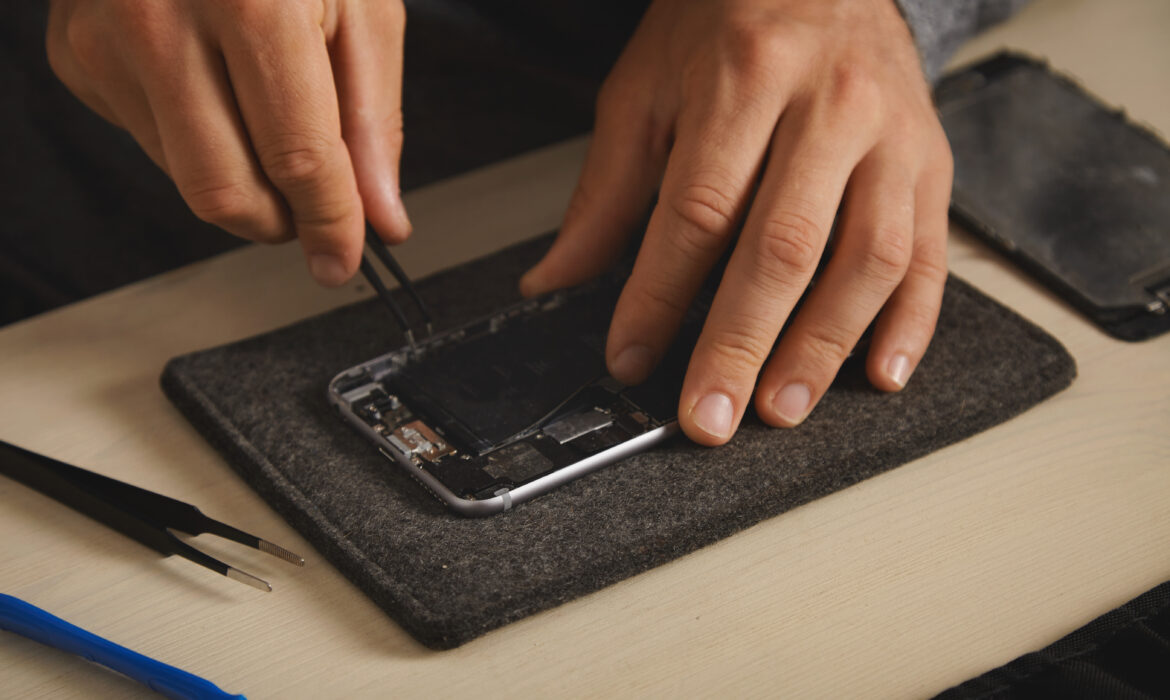
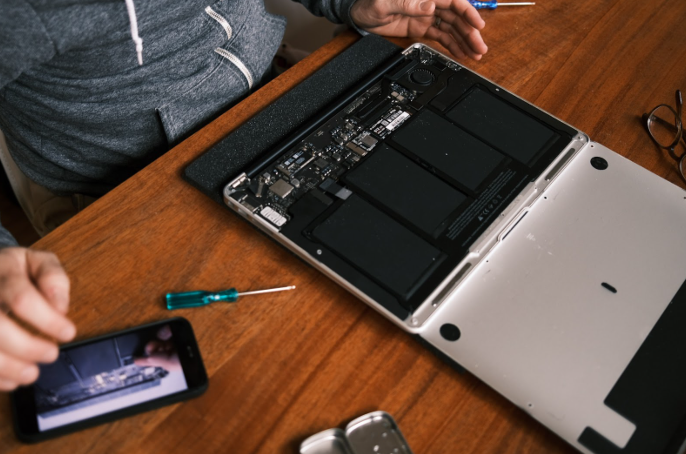
Phone repair has always been a thing, especially for iPhone repair as you can’t just swap out the battery and so on. Although the repair industry is quite established, especially in Singapore, it has a bad rap among the public as people tend to associate third-party repairers with not using original parts. Although some third-party repairs might do that, it has affected the industry. So, it is important to find a reliable third-party repairer. There are a few opinion on this matters, Fix my Gadget showcase the pros and cons of both.
As a third-party shop repairer, there are certain situations where we would recommend for you to go to the Apple Store while there are situations where a third-party shop works wonder.
So, in what situation do you go to the Apple store?
If you are facing some issues after purchasing your iPhone not too long ago, you should take it back to the Apple Store that you bought it from as they will most likely exchange it for you. Not only that, if you face any software issues, sometimes the third-party repairer would not be able to do anything in regard to it.
Where is it fine to repair it in a repair shop?
There are a few situations where we will highly recommend bringing it to a trusted repair shop like us. Firstly, it will be the iPhone service or any kind of mobile servicing. This is because the process of servicing does not require any other component from the Apple Store.
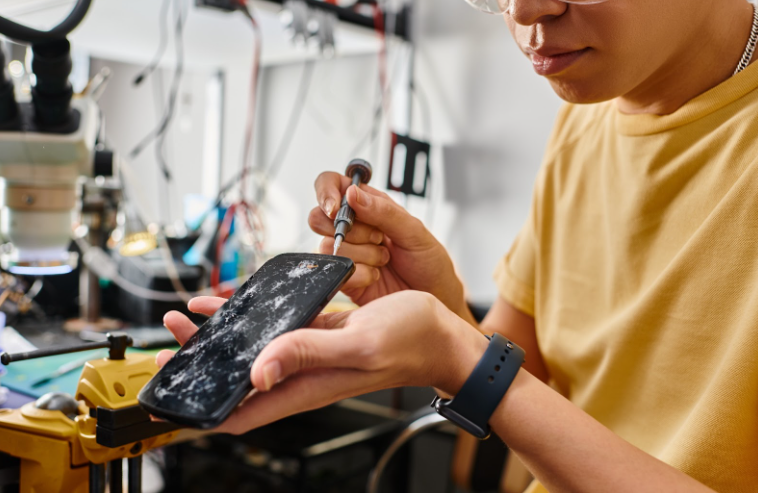
Other than that, we would also recommend changing small components of the phone like iPhone screen repair, iPhone screen replace, or iPhone battery replacement would also be better to fix on the reliable third-party store as it is more likely to be cheaper.
Check out The Fix Bot for affordable yet reliable options of iPhone reparation.
Which Is Better? Repair or Replacing Your Apple Phone
Can’t decide between repairing or replacing your iPhone? Depending on the condition of your phone, an Apple phone repair might suffice. Technology is ever evolving and fixing iPhones is more feasible than you think.
Nonetheless, there are instances where buying a new Apple iPhone might be better. Here’s everything you need to consider:
Cost
Money is a factor when it comes to just about everything. Both repairing and replacing costs money but which one costs more? Well, it depends! Common issues like an iPhone screen repair, battery replacements or glitches will be much cheaper to fix.
On the other hand, some repairs can be quite expensive and you’d be better off buying a new iPhone. Feel free to contact us about your phone before making a decision. We can help you assess the severity of the damage and provide a cost estimate for repairs.
Age
Albeit minimal changes, newer iPhones will always sell out no matter what. Getting a new iPhone for its supposed “updates” may not be the wisest decision. But getting one makes sense if your iPhone is outdated (3-5 years).
Apple typically supports iPhones for about 5 to 6 years with software updates. If your phone is nearing the limit, it might be time to upgrade. If your phone is still functioning well and meeting your needs, there’s no need to rush.
We reckon a tweak here and there will get your iPhone running smoothly again.
Damage
Consider the extent of damage. Screen cracks, weak battery or a faulty camera are usually easy to fix. Minor issues can be repaired and we’ll give you a good quote to assess the cost effectiveness of the repairs!
Some damages are beyond repair and may warrant a complete replacement.You might find yourself spending more on repairs only to face more problems down the line. Long story short, you’re better off getting a new phone.
Performance
Is your iPhone slower than before? Does it take longer to open apps, respond to touch or complete tasks? Performance issues are completely normal, especially if your phone is several years old. So does this warrant a replacement? Not necessarily!
Simple fixes can restore your phone’s performance in most cases. Start with basic solutions like clearing cache or closing background apps. An update to the latest IOS can also improve your phone’s performance.
Another common solution is an iPhone battery replacement. A weak battery will slow your phone down to preserve energy. Replacing it can restore your phone’s speed and extend its lifespan without a full replacement.
Environment
The environmental impact of the iPhone is a major issue. The production of these phones require significant resources. This includes minerals, metals and fossil fuels.
Extracting these resources have major environmental consequences like deforestation, habitat destruction and pollution. In contrast, opting for repairs is much more eco-friendly.
You can reduce the demand for new materials and lower the energy consumption of production. Repairing also prevents landfill fill waste, which can lead to further environmental effects.
Apple Phone Repair at TheFixBot
We offer comprehensive Apple phone repair services for most iPhone models. This includes:
iPhone Battery Issue: We’ll take a look at your battery to see if it’s slowing your phone down. An iPhone battery replacement can usually solve performance issues, extending the lifespan of your phone.
iPhone Cracked Screen: A cracked screen can compromise appearance and performance. We provide screen repairs and replacements to restore your phone to its original condition.
iPhone Cannot Boot Up: An iPhone that won’t turn on can be frustrating. This includes freezing at the Apple logo or not being able to turn on completely. We’ll perform a thorough diagnostic to identify software glitches or hardware issues.
iPhone Water Damage: Water damage will cost long-term problems if not addressed quickly. We’ll use advanced techniques to clean and dry internal components. We’ll even replace damaged parts if necessary.
iPhone Screen Flickering: A flickering screen is caused by software glitches or hardware malfunction. Our team will check for loose connections, software conflict or damaged components.
Tips to Take Care of Your iPhone
Taking proper care of your iPhone can be the difference between longevity, frequent repairs or replacements. Father time always wins but you can slow the process down with the right tips. You can start by using a high quality protective case.
Cheap phone cases are the downfall of most iPhones. That’s why you should invest in a durable case that has comprehensive protection. Look for shock-absorbing materials that cover all sides of the phone. Check out these cases & protection by Apple!
Once you got that down, you can start following these tips:
Get a Screen Protector: A screen protector won’t make your iPhone invincible but it’ll definitely add a layer of protection. It can absorb the impact from accidental drops, preventing cracks on your actual screen.
Or you can get a screen protector with an oleophobic coating for added smoothness. This will reduce fingerprints and smudges on your screen.
Avoid Heat Exposure: Heat will kill your battery. Do not leave your iPhone under the sun and don’t overcharge it. This can cause permanent damage, forcing you to get a battery replacement.
Clean Your Charging Port and Speakers: Dust and debris can get into your charging ports every time you plug in a cable. This will cause charging issues over the long run. Use a soft brush to gently clean your speakers and charging port.
Optimise Your Phone: Optimise your phone by managing background apps and clearing cache data. Turn off non-essential notifications and enable low power mode to conserve battery life.
Optimisation can improve your phone’s overall performance and help it run smoothly for longer periods.
Stay on Top of Updates: Remember to update your iPhone when a new software update is released. Staying on top of IOS updates will protect your phone from malware and hacking attempts. It will also help your phone run faster and smoother.
It’s never too late until it is. Get that Apple phone repair today and start using your phone in no time! We offer quick iPhone repair turnaround time to make sure you get the best value for your money. Contact us to find out more or swing by the store if you happen to be in the area.
Apple Repair Guide – Steps & Tips for Apple Repair
What do frozen screens, draining batteries or malfunctioning apps have in common? They all share the same source – your Apple device. These issues are common Apple problems that come with old age or misuse.
Nonetheless, knowing how to troubleshoot your Apple device can be the difference between a DIY Apple repair or spending money at the service centre.
Whether it’s an iPhone, iPad or Macbook, find out how you can repair your Apple device with our guide :
Common Apple Device Issues

Your Apple issues can stem from two sources; hardware and software. The latter can usually be solved through troubleshooting techniques. On the other hand, hardware problems may need advanced repairs, often requiring professional Apple repair assistance.
Lets breakdown some of these issues and how to address them:
Frozen Screen
A screen that constantly freezes is one of the biggest issues for Apple users. It’s also one of the most frustrating! It can happen on any device including iPhone, iPads and Macbooks. It is usually caused by software glitches or outdated firmware.
How to Fix It
- Force Restart: For iPhones, quickly press and release the Volume Up button, then the Volume Down button, and hold the Side button until the Apple logo appears.
For iPads with a Home button, press and hold the Home and Power buttons at the same time. For MacBooks, hold down the Power button until the screen goes black, then restart.
- Update iOS/macOS: Ensure your device is running the latest software version, as updates often fix bugs.
Weak Battery
A weak battery is usually a hardware problem that needs professional Apple repair. This includes losing power faster than usual or taking a longer time to charge. This is especially common in older iPhone and MacBook models.
How to Fix It
- Check Battery Health: Go to Settings > Battery > Battery Health & Charging. If the Maximum Capacity is below 80% or the device displays a “Service Recommended” message, the battery likely needs replacement.
For MacBooks, open System Settings > Battery > Battery Health to assess battery condition.
- Optimise Battery Usage: Optimising power usage is a proactive way to prolong battery life. This includes reducing background activity by enabling low power mode or adjusting your screen brightness to low.
You should also disable unnecessary features like wi-fi, bluetooth and location.
Unresponsive Touchscreen
An unresponsive touchscreen is another frustrating issue, particularly for iPhone and iPad users. It may result from a software issue, a screen protector interfering with touch sensitivity or hardware damage.
How to Fix It
- Clean the Screen: Ensure the screen is clean and free from dust or grease. Use a microfibre cloth and avoid harsh cleaning agents.
- Reboot the Device: A quick reboot can often fix minor software issues. If the screen is totally unresponsive, conduct a force restart as explained above.
- Check for Screen Protector Issues: Ensure your screen protector is properly applied. Try removing it temporarily to check if the issue continues.
- Update or Restore the Device: Outdated software can cause touchscreen issues. Update to the latest iOS or restore your device using iTunes/Finder if the issue persists.
Overheating Issues
Devices like iPhones and Macbooks can overheat due to prolonged usage. Running heavy applications or exposure to high temperatures can also cause your device to overheat.
Persistent overheating can cause long-term damage, reducing the overall performance of your device.
How to Fix It
- Close Unnecessary Apps: Opening too many apps simultaneously will overload your device’s processor, generating excessive heat. Closing unnecessary apps will allow your phone to run better while decreasing the possibility of overheating.
- Remove the Case: Using a case can trap heat. Remove it temporarily and place your device in a shaded area to help it cool down faster.
- Avoid Direct Sunlight: Prolonged exposure to sunlight or high temperatures can worsen overheating. Always store your device in a shaded area.
Malfunctioning Apps
Malfunctioning apps are a common issue for Apple users. This includes apps freezing, crashing unexpectedly or failing to open. The causes can range from outdated app versions to compatibility problems with your device’s operating system.
How to Fix It
- Force Close: Force the app to close and reopen it to see if it’s working. If the app causes your phone to unexpectedly freeze, force restart your device.
- Update the App: Visit the App Store and check if there’s an available update for the malfunctioning app. Updates often fix bugs and improve compatibility with the latest iOS or macOS.
Reinstall the App: Deleting and reinstalling the app can sometimes do the trick. Reinstalling will ensure you’re running the most latest, stable version of the app.
Extending the Lifespan of Your Device
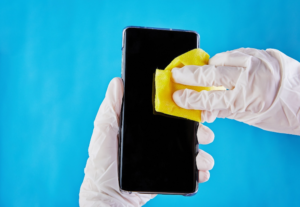
Being proactive through good maintenance habits can help minimise damage and strain to your device. You can start by ensuring your devices are always updated. Staying up to date with the latest iOS or macOS updates will fix bugs, improve performance and enhance security.
Battery care is another crucial aspect of phone maintenance. Avoid exposing your device to extreme temperatures and don’t let your device drain completely. Use official charging accessories to prevent damage to the charging port and don’t overcharge your devices.
Additionally, a regular cleaning routine should also be implemented. Removing dust and debris from ports and vents will prevent hardware issues and overheating. Last but not least, always manage storage space by deleting unnecessary files.
Offloading data to cloud storage will also prevent performance issues.
Conclusion
These troubleshooting solutions won’t guarantee a permanent fix. Some issues are too complex for a DIY Apple repair and that’s when professional help should be considered. Whether it’s hardware replacements or complex software issues, we have the resources to fix your device!
Contact us to find out more!
Guide to Android Repair – Best Methods & Repair Tools
It’s normal for Android phones to experience system errors and hardware problems. Time takes its toll on everything, no matter how well you look after your phone. Even a new phone can be damaged by accident!
The important thing is what you do to get your phone back on track. That’s where our Android repair guide comes in :
Diagnose the Problem
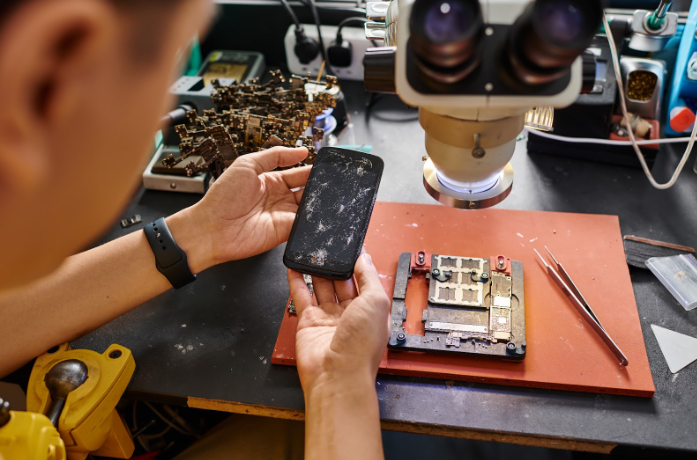
The first thing you should do is diagnose the problem. Do you have a broken screen, a damaged battery, a malfunctioning system or a faulty charging port? That’s how you determine the best solution.
Whether you need an Android screen repair or an Android battery replacement, identifying the issue will put you on the right track. Here are common Android issues users frequently encounter :
- Cracked or Broken Screen: Your phone screen is visibly shattered or cracked. Cracks can affect touch sensitivity and display quality. Even small cracks can worsen over time!
Dead pixels, discolouration and unresponsiveness in certain areas are also signs of screen damage. - Battery Problems: A damaged or deteriorated battery can drain your phone rapidly. It’ll also charge slower or overheat when it’s being used for too long. Unexpected shutdowns or the inability to turn on are more indications of battery damage.
- Software Malfunctions: Software malfunctions include freezing, app crashes, sluggish performance or random reboots. A software glitch may cause your phone to operate slower or cause frequent app errors.
- Charging Port Issues: A faulty charging port may cause the phone to charge at intervals or not at all. Look for signs like loose connections, debris in the port, or the need to hold the cable at a certain angle to charge.
If cleaning the port doesn’t solve the problem, an Android repair or replacement may be necessary. - Water Damage: Water exposure can cause various issues. This includes distorted audio, screen malfunctions and unresponsive buttons. Too much water exposure can affect water proof phones too!
A common sign of water damage is visible condensation under the screen or inside the camera lens. - Audio Problems: Audio problems can come in the form of no sound or distorted audio. It could be due to software glitches or hardware issues like a damaged speaker. Check if the problem persists when using headphones or Bluetooth speakers.
If audio works fine through external devices, your phone’s speaker may need repair. - Camera Malfunctions: A faulty camera will exhibit blurry photos, failure to focus or an error message. Inspect the camera lens for scratches or obstructions. Try using alternative third-party camera apps to see if it’s a hardware or software issue.
- Connectivity Issues: Problems with Wi-Fi, Bluetooth, or cellular connectivity can indicate issues with the device’s antenna or software. Check if other devices can connect to the same network or device.
Try Basic Troubleshooting Steps
Some Android repair issues can be resolved with basic troubleshooting. These methods include:
- Restart Your Device: As cliche as it sounds, restarting your device is actually the basis of all DIY Android Repair. Restarting your phone clears temporary memory and refreshes the system.
This may resolve problems like slow performance, unresponsive apps or connectivity issues. It’s the first thing you should try before considering more invasive repairs. - Clear Cache: The longer you use your phone, the more cache you accumulate. Cache is a temporary data storage for information that your device may use in the future. Overtime, this data can become corrupted or outdated, causing apps to slow down.
Clearing cache can help improve app performance without affecting personal data. To clear cache, open your Android browser and go into settings. The clear cache option should be located under “privacy” or “storage” settings. - Check for Software Updates: How long has it been since you updated your phone? We’ve all postponed updates at some point, but running outdated software can actually lead to performance issues.
Updates protect your phone from malicious software and vulnerabilities. This can improve your phone’s security while enhancing its performance. - Factory Reset: When all else fails, try a factory reset. A factory reset will remove all data from your phone – like giving your phone a fresh start. This will also wipe out any software glitches or corrupted files that may be causing issues.
Remember to store important data elsewhere before proceeding with a reset.
Best Android Repair Tools
A DIY Android repair is more practical than ever considering how many tools we have at our disposal. These tools come in the form of software applications, so you don’t have to worry about getting your hands dirty. This includes:
- Repair System – Software Update: Repair System – Software Update is designed to troubleshoot basic issues. It can repair system problems while managing all your apps. It can solve system crashes, app crashes and slow performance.
It also has a cleaner to remove unnecessary files. This tool is highly recommended for those who want to optimise their Android phone easily and quickly. - Phone Doctor Plus: Phone Doctor Plus is a comprehensive diagnostic app. It can provide a thorough analysis of your device’s hardware and software. It checks over 30 features, including battery health, storage, CPU, and more.
This app is a great way to get detailed insights and identify any potential issues before they worsen.
- Greenify: Is your Android’s battery rapidly depleting? Maybe this is not so much of an Android repair case but an issue of managing background apps. That’s where Greenify comes in. Greenify helps you hibernate applications in the background.
Hibernated apps will be completely static, reducing strain on your device. This can extend your battery life and improve your phone’s overall performance. - 3C All-in-One Toolbox: The 3C All-in-One Toolbox is a comprehensive tool for device management. It can manage files, schedule tasks, optimise battery and more. One of its standout features is the ability to monitor and control system performance in real time.
This gives you the ability to track CPU usage, RAM consumption, and battery health. - WiFi Analyzer: Some internal issues can cause connectivity issues or unstable Wi-Fi connections. With WiFi Analyzer, you can easily analyse and optimise your Wi-Fi. This includes optimising information to decrease interference and increase connection speed.
Get Professional Help

Software applications can only do so much. Sometimes, professional help is the only way to get an Android repair. At Fixbot, you can rest assured that we’ll do our best to get your phone fixed. We have the tools, applications, manpower and most importantly, the expertise!
Contact us to find out more!
What to Do With an Old iPhone, Useful Tips & Tricks
People want new stuff all the time. That’s why iPhones always sell out no matter how many iterations they come up with. So what happens to your old iPhone? Do you throw it away? Do you give it to someone else? Do you sell it to make a quick buck?
Here are useful tips and tricks on what you can do with your old iPhone:
Use It as a Backup Phone
Having a backup phone can help you in more ways than one. You can use it when your phone is low on battery. You can use it to store pictures or files when your phone is out of storage. You can even use it for business purposes and client communications.
The opportunities are endless! If your device is not running properly, send it for an Apple device repair. We’ll do our best to get your iPhone up and running again.
Use It as a Smart Home Device
Your old iPhone can serve as a dedicated smart home controller. You can control smart lights, security cameras, thermostats, and more with apps like Apple’s Home, Amazon’s Alexa, or Google Home.
It’s a great way to breathe new life into your device while enhancing your home’s convenience and security.
Use It as an iPod
The iPod was discontinued in 2022 but that doest mean you can’t turn your old iPhone into a makeshift iPod. The iPod was designed as a media player for music, videos and podcasts, a role an iPhone can easily fulfil.
All you have to do is clean out unnecessary apps, download the right ones, and boom, you have a dedicated media device – just like an iPod! You can use it exclusively for media consumption so you dont waste battery on your main phone.
Use It as an Alarm Clock
iPhone alarms are known for being loud. Turning your old iPhone into an alarm clock will help you wake up on time while offering added functions. You can customise your iPhone with features like a big clock widget or a desk clock app.
You can even prop it on a stand so it looks more like a traditional clock.
Turn It Into a Security Camera
Yes, your iPhone can be used as a security camera, a CCTV, a baby monitor or even a pet cam. Third party apps like Alfred Camera and AtHome Camera can turn your old iPhone into a fully functioning camera device.
It’s a budget friendly way to keep your house under watch while you’re away.
Turn It Into a Webcam
If your old iPhone can turn into a security camera, it can definitely be repurposed into a webcam. With the rise of remote work, having a reliable webcam is more important than ever.
iPhones are built with high quality cameras and turning one into a webcam can be a great alternative. Just mount your old iPhone on your Mac desktop and you have yourself a webcam. Follow these steps to get started.
Turn It Into a Apple TV Remote
You can never have too many remotes. Turning your old iPhone into an Apple TV remote is a great way to repurpose your device. You’ll have two remotes at your disposal and the chances of being “remote-less” will be closer to zero!
All you have to do is access the Apple TV Remote icon in the control centre or add it manually. Check out this Apple TV User Guide to find out more.
Experiment with Jailbreaking
For the tech-savvy, jailbreaking your old iPhone can unlock a world of options. You can install apps not available in the App Store, tweak the user interface, and even use it as a portable hotspot.
However, be cautious, as jailbreaking can void warranties and potentially lead to security risks. Your iPhone will be susceptible to malware and viruses that can steal your data.
Trade In Your Device (Or Recycle)
Consider trading your old iPhone online or at the Apple store. Some third-party vendors might accept a trade too. Trading in will give you better deals when you buy a new device.
If your device is ineligible for credit, consider recycling your iPhone for free. You may not get any monetary value but at least you’re doing something good for the planet.
Sell It for a Quick Buck
There’s always someone looking for a good deal – especially if it’s an iPhone. Chances are your old iPhone still holds value, even if it is a few years old. iPhones are known for their longevity and many people are willing to buy used models.
That’s why you should always take care of your iPhone even if you plan to change it every now and then – the better the condition, the higher the resale value!
Your old iPhone doesn’t have to remain inactive for long. Repurposing it through these tips and tricks can turn your old iPhone into a new tool. And when in doubt, you can always sell it off, trade it in or recycle it for the greater good.
Fix your Apple device with Fixbot! Contact us to find out more.
iPhone Secrets: 8 Things You Didn’t Know Your iOS Device Could Do
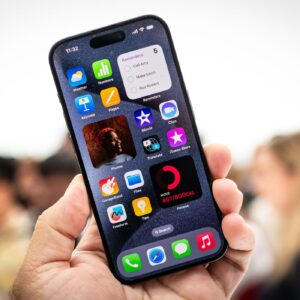
There’s no question that an iPhone packs a ton of functionality into a small package. But even iOS users might not know all the hidden tricks that an iPhone is capable of.
8 Things You Didn’t Know Your iOS Device Could Do
Fixbot wants to give you a list of our favorite hidden and little-known iPhone features.
1. Change an eBook into an Audio Book
One neat — and often overlooked feature — is the iPhone’s ability to read any text on the screen out loud. While normally a feature to aid seeing impaired users, it can also turn any ordinary eBook into an audiobook.
To use it, go to:
Settings > General > Accessibility > Speech
From here, activate the Speak Screen function. Once you do, you can swipe down from the top of your screen with two fingers in any app — and it’ll read any text displayed on the screen to you. You can tweak certain functions, too — like voice gender and speaking speed.
2. Use Your iPhone as a Scanner
In our increasingly digital-driven world, it can be hard to find an analog scanner when you’re out and about. Luckily, the iPhone can easily mimic this function with the help of certain apps, like Scanbot, Dropbox, and Microsoft’s proprietary Office Lens.
Using these apps, you can simply take a picture of a document — or whiteboard, or business card — and turn it into a digital copy, which you can then export save, or export. Some of these apps also offer an Optical Character Recognition feature, which lets you search the digital documents as if they were text files.
3. Use the iPhone’s Hidden Trackpad
While trackpads are normally the realm of laptops and desktops, any iPhone with 3D touch also has a trackpad hidden within its features — which can be extremely useful for editing text on your smartphone.
To use it, simply press and hold firmly on the keyboard within a text app. From here it’ll automatically switch to trackpad mode — you’ll know it’s working when you see the keyboard’s characters disappear. From here, you can move the cursor around more easily, and select, highlight or edit certain portions of text much quicker than you normally could.
4. View all the Photos a Contact has Texted You.
If you’ve been texting someone in iMessage for any period of time, you know how quickly a message thread can become huge. If you want to find a picture your friend sent you last month, for example, it can be cumbersome and time-consuming to try and scroll all the way up to find it.
Luckily, there’s an easier way to find photos. Simply open a thread in iMessage, and click the circular “I” icon in the upper right corner. From here, you can see a list of all the photos and attachments that you or your friend have sent each other.
5. Get Location-Based Reminders
By now, basically, everyone knows that you can ask Siri to give you time-based reminders, but you can also ask Siri to give you location-based reminders too. For example, you can say, “Remind me to call my brother when I get home.” If you’re at work, you can ask Siri to remind you to get to gas when you leave — and you’ll be sent a notification when you begin driving away.
For this to work properly, you’ll need to create updated cards in your Contacts with information like name, address, and contact relationships. To do so, simply open Contacts and tap the contact you want to edit. Your personal contact card can be seen at the top of your contacts list.
6. Control Your iPhone with Your Head
Sure, you can control your iPhone with your voice — but did you know that you can also control it with your head? Now, it’s not exactly mind-control, but it’s pretty cool to use head gestures to control certain system functions on your smart device.
To activate this little-known feature, open Settings, and go to General > Accessibility > Switch Control. Tap on the Switches option, and add a new switch using the Camera as a source. To activate Siri with a head gesture, for example, select Right Head Movement, and then Siri under System Setting. If Switch Control is on, you should see blue rectangles scanning objects on your iPhone’s screen. Tilt your head to the right, and Siri should be activated.
7. Apply a Color Filter to Your iPhone
One of the new and little-known features in iOS is the addition of what’s called “Color Filters.” This is a great way to make your iPhone easier on the eyes, or to tweak certain display colors to make the iPhone more accessible for color-blind users.
To activate it, simply go to General > Accessibility > Accommodations > Color Filters. The grayscale mode introduced in iOS 8 has been moved here — if you feel the need to add a noir aesthetic to your phone. Otherwise, you can select from a range of color swap options, or simply apply a Color Tint to your iPhone. The latter feature is similar to Night Shift but lets you tint the display basically in any hue or intensity you want.
8. Teach Siri Proper Pronunciation
Siri is a great tool for productivity and convenience on an iPhone, but there’s no getting around the fact that sometimes it can pronounce things a little off. Case in point: Siri’s infamous mispronunciation of Barbra Streisand’s name.
To teach Siri to pronounce a name better, just activate Siri and say “That’s not how you pronounce (blank).” Siri will then ask you to pronounce the first and last name of a Contact, for example — and then ask you to select from a few different playbacks.
How To Fix Scratches On Liquid Screen Protector

Fixing scratches on a liquid screen protector can be challenging, as they form a hardened, transparent layer. DIY solutions may include applying a small amount of toothpaste or baking soda mixed with water on the scratch and gently rubbing with a soft cloth. However, success is not guaranteed, and it’s often more effective to prevent scratches by reapplying a new layer of the liquid screen protector for continued protection.
Materials Required to Fix Scratches on Liquid Screen Protectors
Here’s what you’ll need:
- Soft Cloth
- Toothpaste
- Baking Soda
- Metal Polish
- Scratch Remover Pen
- Water or Rubbing Alcohol
These items are easy to find and affordable, making it simple to do the scratch removal process at home.
Ways to Fix Scratches on the Liquid Screen Protector
1. Using Toothpaste
Toothpaste isn’t just for your teeth; it can also work wonders in fixing minor cracks. Apply a small amount of toothpaste to the scratches and gently rub it in using a microfiber cloth. The mild abrasiveness can help diminish the scratches, leaving your liquid screen protector looking clearer.
2. Using Baking Soda
Similar to toothpaste, baking soda’s fine particles can aid in smoothing out surface scratches. Create a paste with baking soda by mixing a small amount of it in water. Then, apply the mixture on the scratches and softly rub it in using a soft microfiber cloth. This method is effective to getting rid of light scratches.
3. Using Metal Polish
Deeper or more stubborn scratches may require the assistance of metal polish. Apply a small amount of metal polish compound to the scratched area and gently buff it with a soft cloth. The compound’s abrasive properties can help eliminate more pronounced scratches, restoring the smoothness of your liquid screen protector.
4. Using a Scratch Remover Pen
For a specialized approach, consider using a scratch remover pen designed explicitly for various screen protectors, including liquid glass protectors. Follow the pen’s instructions to apply it to the scratched area. These pens often contain solutions that help minimize and fill in scratches, providing a quick and efficient fix.
5. Apply Another Screen Protector
If the scratches are extensive and DIY solutions don’t yield the desired results, consider applying another phone screen protector. This won’t remove the existing scratches but will provide a new, clear layer of protection, preventing further damage to your device’s screen. It’s a practical solution that can be easily done at home.
Conclusion
So this is how to fix the cracked liquid screen protector. If all else fails, applying a new screen protector or seeking expert guidance from a Phone repair shop ensures your device’s screen stays clear and scratch-free.
For more information, refer to the FAQ section below.
Frequently Asked Questions
Q1. Do liquid screen protectors scratch?
Liquid screen protectors create a durable, invisible layer on your device’s screen, reducing the risk of scratches. However, they are not entirely scratch-proof and may still get scratched under extreme conditions.
Q2. What should be done if the liquid screen protector cracks?
If a liquid screen protector cracks, there’s not much you can do to repair it. However, the damage is typically minimal and may not affect the underlying screen. You can consider applying a new layer of liquid screen protector to maintain protection.
Q3. What should you do if your screen protector is scratched?
If your traditional screen protector is scratched, it’s time for a replacement. Remove the damaged protector and install a new one to ensure continued protection for your device’s screen. Many devices come with multiple protectors in a pack for such situations
How To Fix Cracked Laptop Screen Without Replacing?
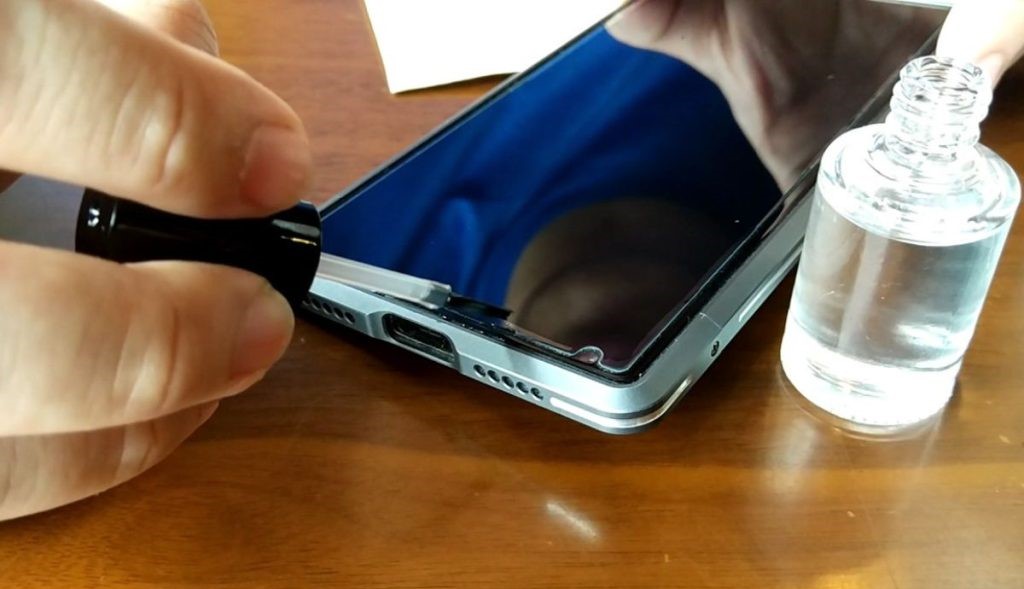
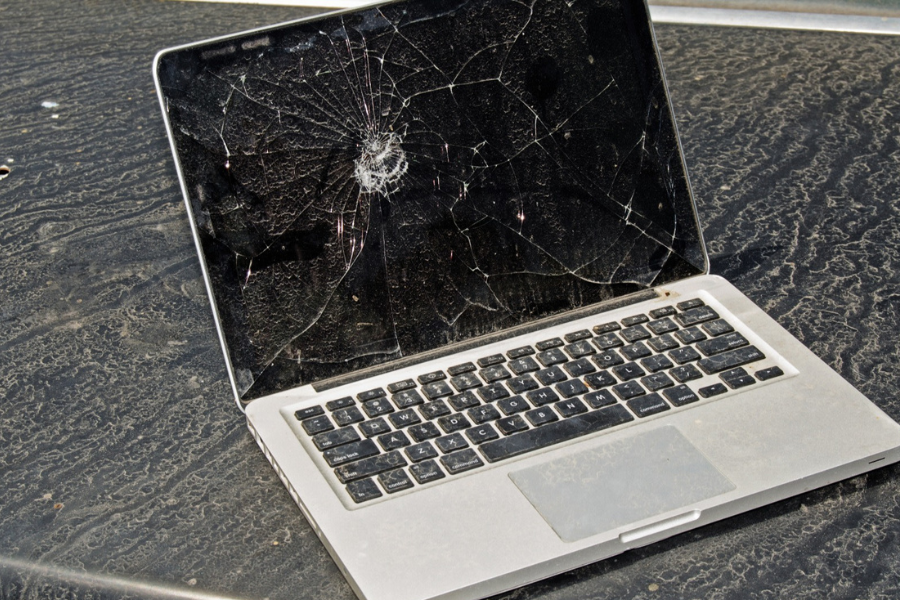
Fixing a cracked laptop screen without replacing it is a complex task. The experts recommend replacing the cracked laptop screen to prevent inconvenience. However, there are a few hacks that you may try before you decide to go for the replacement. For small cracks, applying clear nail polish or a screen protector can prevent further damage. Alternatively, using a windshield repair kit with resin may help fill in and minimize the appearance of the crack. However, for more extensive damage, seeking professional assistance is recommended.
What Causes a Broken Laptop Screen?
8. Tips To Fix Cracked Laptop Screen Without Replacing
Here is how you can fix a cracked laptop screen without replacing it.
1. Restart the Laptop
A simple restart might work wonders. Sometimes, glitches causing screen issues can be resolved by rebooting the laptop. Give it a shot and see if the problem persists.
2. Inspect for Dust or Debris
Believe it or not, dust or debris caught in the cracks might contribute to the issue. Gently clean the surface and around the edges of the crack, being careful not to exacerbate the damage. Sometimes, a clean screen can function more effectively.
3. Try an External Monitor
If the crack is affecting your laptop’s functionality but not its display, connecting an external monitor can provide a temporary solution. This way, you can still use your laptop while considering repair options.
4. Fix the Dead Pixels
Dead pixels can be an irritating consequence of a cracked screen. Various online tools and apps claim to fix dead pixels by rapidly changing colors, potentially jolting the pixel back to life. Keep in mind that success isn’t guaranteed, and exercise caution with such tools.
5. Update the Video Card Drivers
Outdated or corrupted video card drivers may contribute to display issues. Check for updates through your laptop manufacturer’s website or the device manager. Installing the latest drivers might improve the screen’s performance.
6. Fix Screen Burn-In
If your cracked screen has led to burn-in issues, where static images persist even when you’re on a different screen, there are software solutions available. Running screen savers or using specialized tools may help mitigate the effects of burn-in.
7. Check Screen and Backlight Connections
8. Seek Professional Assistance
Conclusion
In conclusion, while there are DIY steps to address some issues related to how to fix a cracked laptop screen without replacing it, seeking professional assistance is paramount for a permanent solution. Whether it’s fixing dead pixels, updating drivers, or checking connections, these measures might offer temporary relief but should not substitute for professional repair services when needed. Your laptop screen is a vital component, and investing in its proper repair ensures the longevity and optimal performance of your device.
Frequently Asked Questions
Is it possible to fix a laptop screen without replacing it?
Yes, it is possible to fix some laptop screen issues without replacing the entire screen. Minor problems, such as dead pixels or loose connections, can often be repaired.
Can a cracked laptop screen be repaired?
In many cases, a cracked laptop screen can be repaired. However, the success of the repair depends on the extent of the damage. Small cracks or those limited to the glass may be fixable, while extensive damage may necessitate a screen replacement.
Can you fix a cracked screen without replacing it?
Yes, you can fix a cracked screen without replacing it, but it depends on the severity of the damage. For minor cracks, professional repair services may offer solutions like adhesive applications or glass replacements without replacing the entire screen.
How to Fix Keys Not Working On Logitech iPad Keyboard?
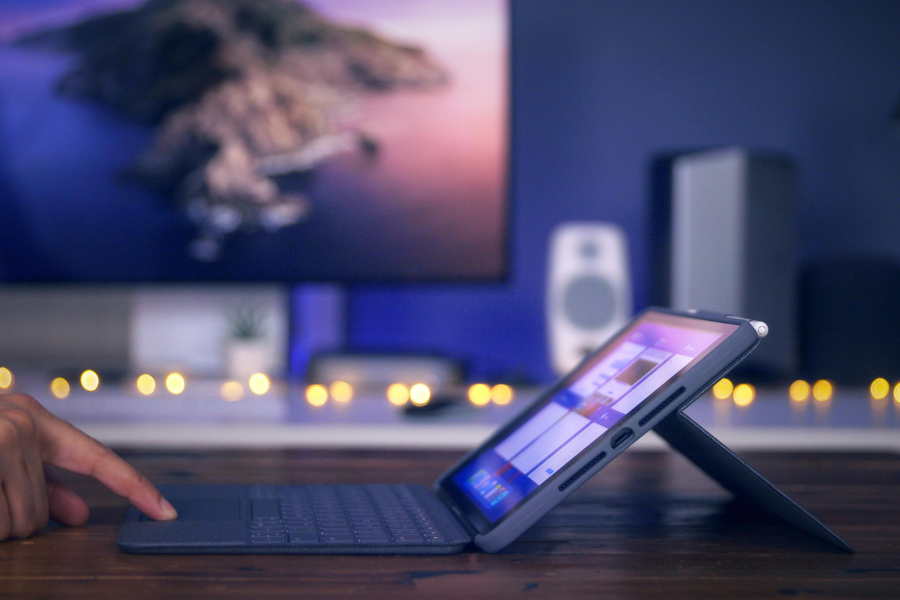
If you’re facing issues with non-responsive keys on your Logitech iPad Keyboard, start by checking the Bluetooth connection. Ensure the keyboard is correctly paired with your iPad. If the problem persists, try reconnecting the keyboard or replacing the batteries. For detailed troubleshooting, consult the Logitech user manual or reach out to Logitech support for assistance. When seeking the best iPad repair solutions, our team at Fix My Gadget is ready to provide expert guidance and comprehensive resolutions.
8. Tips to Fix Keys Not Working on Logitech iPad Keyboard
Here’s what you have to do.
1. Check The Power, Bluetooth, and Wired Connection
2. Restart Your iPad
A simple restart can resolve software glitches affecting the keyboard. Power off your iPad, wait a few seconds, and then power it back on. If the problem still persists, move on to the next steps.
3. Check Its Compatibility
Ensure your Logitech iPad keyboard is compatible with your iPad model and the installed iOS version. Incompatibility may result in key malfunctions. You can do that by checking Logitech’s official website for a list of supported iPad models. You must also ensure that your iPad runs the minimum iOS version specified by Logitech for optimal functionality.
4. Clean The Keyboard Using Compressed Air
5. Update The Software
6. Try Repairing the Keyboard
Unpair the Logitech keyboard from your iPad and then re-pair it. Go to iPad Settings > Bluetooth, locate the keyboard, and tap “Forget This Device.” Then, reconnect the keyboard.
7. Replace the Batteries
8. Seek Professional Help
If, despite trying the above steps, the issue persists, it’s advisable to seek professional assistance. Reach out to Logitech support or visit us at Fixbot.com for a thorough diagnosis and resolution. Understanding how to fix keys not working on the Logitech iPad Keyboard involves a systematic approach, from checking connections to ensuring software compatibility. Follow these steps to troubleshoot, and if needed, don’t hesitate to contact us for expert help and a comprehensive resolution. For more information, refer to the FAQ section below:
Frequently Asked Questions
Why are some keys on my Logitech iPad keyboard not working?
If certain keys on your iPad keyboard are unresponsive, it may be due to debris or dust accumulation. Try cleaning the keyboard thoroughly, or consider restarting your iPad to resolve any software glitches.
How do I fix the keys on my Logitech keyboard for iPad?
To address issues with keys on your Logitech iPad keyboard, start by checking the Bluetooth connection. If the problem persists, disconnect and reconnect the keyboard or try replacing the batteries. If all else fails, consult the user manual or contact Logitech support for specific troubleshooting steps.
How do I reset my Logitech keyboard on my iPad?
To reset your Logitech keyboard on your iPad, first, ensure it’s paired via Bluetooth. Then, go to your iPad’s Bluetooth settings, forget the keyboard, and reconnect it. If the issue persists, consult the Logitech user manual for model-specific reset instructions or reach out to Logitech support for assistance.
How to Check iPhone Battery Health Without Activating
Want to learn how to check your iPhone battery health without activating it fully? Look no further! Consider using third-party apps when connected to a computer. Alternatively, briefly activate your iPhone, access Settings > Battery, and view Battery Health metrics. Remove the SIM card afterward without affecting the battery data. Monitoring battery health ensures optimal performance and helps to determine if your phone’s battery needs replacement offering a proactive approach to device longevity.
Tips on How To Check Your iPhone Battery Health Without Activating It Fully
Below, we have explained in detail how to check your iPhone battery health without activating it fully.
Using a Third-Party App
One nifty way to check your iPhone battery health without the hassle of activation is by using a third-party app. Apps provide detailed insights into your battery’s performance. Just connect your iPhone to your computer, launch the app, and voila – you’ll have a wealth of information about your battery’s health, including its maximum capacity and current state.
Utilizing iOS Built-in Features
Believe it or not, you can extract some battery health information directly from your iPhone without activating it. Here’s how:
- Activate Your iPhone Temporarily: Begin by activating your iPhone using any valid SIM card.
- Access Settings: Once activated, head to the “Settings” app.
- Navigate to Battery: In the “Settings” menu, scroll down and tap on “Battery.”
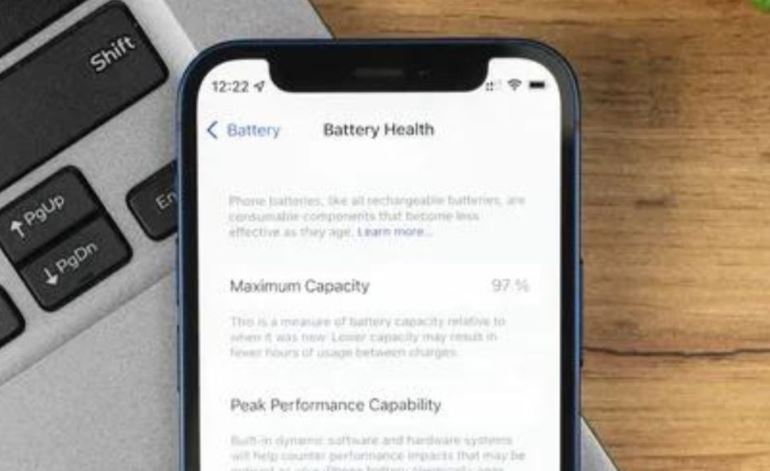
- Battery Health: Under the “Battery” menu, you’ll find the “Battery Health” section. Here, you can view critical details like Maximum Capacity and Peak Performance Capability.
- Remove the SIM Card: After checking the battery health, you can safely remove the SIM card without affecting the battery health data.
Interpreting Battery Health Metrics
Now that you’ve figured out how to check your iPhone battery health without activating it fully, let’s decipher what these metrics mean:
- Maximum Capacity: This represents your battery’s original capacity versus its current capacity. A higher percentage indicates a healthier battery, while a lower percentage signals wear and tear.
- Peak Performance Capability: This feature assesses whether your battery can support the maximum performance of your iPhone without unexpected shutdowns. If your battery is operating at peak performance, you’re in the clear.
Why Check iPhone Battery Health?
After learning how to check your iPhone battery health without activating it fully, you might wonder, “Why bother checking my iPhone battery health at all?” Well, my tech-savvy friends, there are several good reasons:
- Performance Optimization: Monitoring your battery health helps ensure your iPhone operates at its best. A degraded battery can lead to performance issues, and being proactive allows you to address potential problems.
- Battery Replacement Timing: If your battery health is significantly degraded, it might be time for a replacement. Checking this metric helps you determine whether it’s worth investing in a new battery for improved longevity.
- Preventing Unexpected Shutdowns: A declining battery may result in unexpected shutdowns, especially during demanding tasks. Keeping an eye on battery health allows you to take preventive measures and avoid inconvenient surprises.
If interpreting battery health metrics feels like deciphering a secret code, fear not! iPhone repair experts can not only check your iPhone battery’s health but also guide you on the best course of action. Whether it’s optimizing performance, recommending a battery replacement, or addressing any concerns, the team has got you covered.
Conclusion
There you have it – the inside scoop on how to check your iPhone battery’s health after replacement without activating it fully. Whether you opt for a third-party app or utilize iOS built-in features temporarily, understanding your battery health is a smart move. It empowers you to make informed decisions about your device’s performance and longevity. And if you ever need a helping hand, thefixbot is just a click or visit away. Keep those iPhones running smoothly, folks!
Frequently Asked Questions
How do I check my iPhone battery health before buying?
Before purchasing an iPhone, navigate to Settings > Battery > Battery Health to assess the battery’s maximum capacity and peak performance capability. A higher capacity percentage indicates a healthier battery, ensuring you make an informed decision about the device’s overall condition.
How do I check my iPhone battery health log?
To access your iPhone battery health log, use third-party apps like “Battery Life” or “CoconutBattery” when connected to a computer. These apps provide detailed insights into your battery’s performance and history, offering a comprehensive view of its health.
What is the code to check iPhone battery health?
There isn’t a specific code to check iPhone battery health directly. Instead, access Settings > Battery > Battery Health on your iPhone to view key metrics. Alternatively, use third-party apps or connect to a computer for more detailed insights into your battery’s overall health and performance.
Is It Better To Replace Broken iPad Screen or Buy a New One?
When your iPad screen breaks, you usually have two options: whether to get the broken iPad screen replaced or replace the entire iPad with a new one. Now, the major question arises: is it better to replace your iPad’s damaged screen or should you invest in a new iPad entirely?
It depends on various factors like cost, device age, and personal preference. If the repair cost is significantly lower than a new iPad and the device meets your needs, replacing the screen is a cost-effective option.
However, What to do with an old iPad with a cracked screen, when the repair cost is high, so purchasing a new one may be more practical. Consider your budget and the overall condition of the device to make the best choice.
Replacing Broken iPad Screen vs. Investing In A New iPad
Here are some factors that you must consider when making the decision.
1. The Emotional Attachment Factor
Let’s start with the emotional angle – that iPad has been your trusty sidekick through thick and thin. It’s seen your triumphs and survived your countless Netflix binges. The sentimental value alone might sway you towards repairing the screen rather than parting ways with your trusted companion.
2. The Cost-Efficiency Conundrum
Now, let’s talk dollars and cents. Fixing a cracked iPad screen without replacing it is generally more budget-friendly than splurging on a brand-new tablet. While the latest models might tempt you with their fancy features, consider whether those bells and whistles are worth the dent in your wallet.
3. DIY or Professional Intervention
If you’re the adventurous type, you might be contemplating a DIY screen repair. While there are kits available, let’s be real – iPads are intricate pieces of technology, and a DIY job can quickly turn into a disaster. Professional intervention ensures precision and reduces the risk of turning your iPad into a costly paperweight.
4. The Environmental Impact
In an era where environmental consciousness is crucial, repairing your cracked iPad screen is an eco-friendly choice. Opting for repair reduces electronic waste, contributing to a greener planet. It’s a small action with big consequences for Mother Earth.
5. The Performance Perspective
If your iPad is still chugging along, handling your daily tasks with ease, why fix what isn’t broken (aside from the actual broken screen, of course)? Unless you’re craving the latest processing power or features, sticking with a repaired iPad can keep you cruising smoothly through your digital endeavors.
6. The Latest and Greatest Temptation
Ah, the allure of the newest iPad model – slimmer, faster, shinier. It’s tempting, no doubt. But before you succumb to the siren call of the latest and greatest, evaluate whether the advancements align with your actual needs. If your current iPad meets your requirements, a repair might be the smarter choice.
7. Time is of the Essence
Consider the urgency of your situation. If you rely heavily on your iPad for work, entertainment, or staying connected, a speedy screen repair might be the quickest route to normalcy. Buying a new iPad involves the hassle of data transfer, setting up preferences, and adjusting to a new device – not to mention the dent in your bank account.
8. The Warranty Wager
Check if your iPad is still under warranty. If it is, and the damage is covered, congratulations! You might be eligible for a free or discounted iPad repair service. However, be aware that attempting a DIY repair or seeking third-party assistance can void your warranty, so proceed with caution.
Conclusion
The answer lies in your unique situation. If you’re emotionally attached, on a budget, and keen on reducing your environmental footprint, repairing the screen makes sense. On the flip side, if you crave the latest tech, have a warranty in your corner, or time is of the essence, a new iPad might be the way to go.
Thefixbot is your go-to ally in this decision-making journey. Our expert technicians can assess the damage, provide cost-effective solutions, and have your iPad look as good as new. Whether you choose to repair the damaged screen or replace your iPad, remember – it’s all about what works best for you and your iPad love story. Happy fixing!

